This is my first post, and I couldn’t be more excited to share this journey with you!
I’ve always been amazed by cloud and virtualization technologies, so I decided to dive into Kubernetes and containerization. However, a few months ago, I found myself frustrated by how abstract and theoretical Kubernetes felt in online courses. I realized the best way to truly understand it was to build something real. That’s how the idea of a Kubernetes homelab came to life — a hands-on project to turn my curiosity into practical skills by breaking things, fixing them, and learning along the way.
In this series, I’ll share my journey of building a Kubernetes homelab from scratch — the tools, the wins, the obstacles, and the lessons — all based on personal, real-world experiences rather than typical tutorials.
All the configurations and code snippets I use in this series can be found in my GitHub repository: Kubernetes Homelab.
In this first stage, I opted to deploy the cluster on bare metal due to the limited specs of my setup, but I plan to extend my homelab by adding more nodes as VMs to explore scalability and test different technologies and configurations.
1. What Am I Building? The High-Level Roadmap
Here’s the vision I started with:
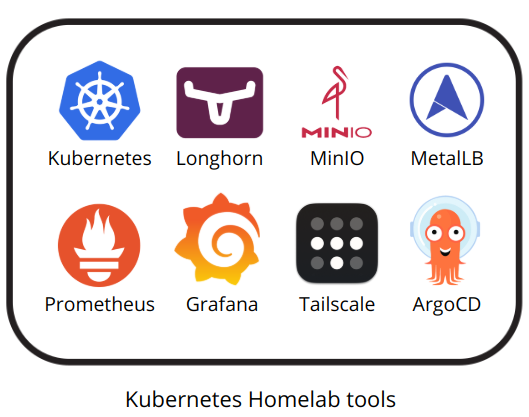
- Set up a K3s cluster: A lightweight Kubernetes cluster using a Beelink Mini PC as the control plane node and worker nodes distributed across additional devices like Raspberry Pis.
- Persistent Storage: Leverage Longhorn for distributed storage and backups. Integrate with a NAS for additional S3-compatible storage using MinIO.
- Networking and Ingress: Use MetalLB for LoadBalancer functionality and Tailscale for secure ingress.
- Monitoring and Observability: Deploy Prometheus and Grafana for visualizing cluster health and workload performance.
- GitOps Automation: Adopt ArgoCD for GitOps workflows, ensuring all configurations are declarative and version-controlled.
- Applications: Run a suite of homelab apps like Uptime Kuma, Grafana, Prometheus or Home Assistant for practical use cases.
- Federation: Experiment with federated Kubernetes clusters interconnected via Tailscale.

2. Why a Kubernetes Homelab?
For me, this project combines two things I love:
- Learning by Doing: I’ve always believed the best way to learn a technology is to build with it. A homelab gives me a real-world environment to test tools, optimize workflows, and troubleshoot problems without production pressure. It’s an opportunity to move beyond theory and work hands-on with practical challenges.
- Freedom to Experiment: Unlike work environments with constraints, a homelab is a space I can freely break and rebuild. I’m experimenting with federating clusters via Tailscale, testing GitOps workflows with ArgoCD, and exploring Kubernetes on diverse hardware setups. It’s a dynamic environment, constantly evolving as I add apps and tools to push its limits and build confidence in managing cutting-edge technology.
3. My Hardware Setup
Here’s what I started with:
- Beelink Mini S12 Pro
- Intel N100, 16GB RAM, 500GB NVMe SSD.
- Serves as the control plane node and also a worker node for the cluster.
2. Raspberry Pi 4
- 4GB RAM with 120GB SSD.
- Configured as a lightweight worker node.
3. Synology NAS
- Integrated via MinIO for S3-compatible storage and NFS shares, and used to store the Longhorn backups.
4. Networking
- Stable LAN with MetalLB handling LoadBalancer IPs and Tailscale for secure connectivity.
4. Getting Started: Setting Up the K3s Cluster
To kick things off, I started by setting up a K3s cluster — a lightweight Kubernetes distribution perfect for homelabs. Here’s how I approached it:
Why K3s?
K3s is a lightweight Kubernetes distribution specifically designed for edge computing and resource-constrained environments. Unlike the standard Kubernetes distribution, K3s reduces complexity by integrating essential components, making it an excellent choice for homelabs where simplicity and efficiency matter. Compared to Minikube or kubeadm, K3s excels in being production-grade and lightweight, with a minimal resource footprint.
Step 1: Install K3s on the Beelink Mini PC
I used the Beelink Mini S12 Pro as my control plane node. Installing K3s was straightforward:
curl -sfL https://get.k3s.io | sh -

sudo systemctl status k3s
This command installs K3s and starts the service. Verify it’s running with:
kubectl get nodesYou should see your control plane node listed as Ready.
Step 2: Add the Raspberry Pi as a Worker Node
To add a worker node, I retrieved the token from the control plane:
sudo cat /var/lib/rancher/k3s/server/node-tokenThen, on the Raspberry Pi:
curl -sfL https://get.k3s.io | K3S_URL=https://<control-plane-ip>:6443 K3S_TOKEN=<token> sh -Now the Raspberry Pi should be connected to the cluster. Verify with:
kubectl get nodesYou should now see both nodes listed.
Step 3: Troubleshooting
While setting up my Kubernetes cluster, I encountered a “permission denied” error with /etc/rancher/k3s/k3s.yaml. Here's how I resolved it.
- Copy the kubeconfig file to your home directory:
mkdir -p ~/.kube sudo cp /etc/rancher/k3s/k3s.yaml ~/.kube/config
sudo chown $(id -u):$(id -g) ~/.kube/config chmod 600 ~/.kube/config
2. Set the KUBECONFIG environment variable:
export KUBECONFIG=~/.kube/config5. What’s Next?
In the next post, I’ll focus on Persistent Storage, which is a critical aspect of any Kubernetes setup. I’ll cover:
- Leveraging Longhorn for distributed storage and backups to enhance resilience and mimic real-world production environments.
- Integrating with a NAS using MinIO for S3-compatible storage, adding flexibility for backups and data sharing across nodes.
These tools will strengthen your homelab and provide practical insights into real-world storage strategies.
6. Let’s Build This Together
This homelab is a journey, not just a project. I’ll document every step — the wins, the obstacles, and the lessons.
If you’re building your own homelab, I’d love to hear from you. Share your thoughts, ideas, and questions in the comments. Let’s learn and build together.
Stay tuned for the next post! 🚀


